
If you have not read yet the post about random walk index, please do so because we are going to dig further on this wonderful random walk space.
As highlighted many times, trading is about YOU. You have some objectives, you have some time you can allocate to trading, you have sensitivity whereby you don’t want to have long series of failures even if at some point you get a 200 RR trade which make you hugely profitable, etc, etc…
To apply random walk, you first need to define for how long you commit your money to market, then change the parameters to capture moves within your sensitivity. Some random parameter testing will help you through this first phase.
Random walk is indeed about capturing trends as explained in previous post, but it can also show you some supply and demand zones from which you can kick some very good trades. Note that you would be better off of course with an order book analysis, but institutions orders are well hidden and any supply / demand zones displayed on chart are therefore pure conjecture.
So let’s bring back Random Walk Index on the price chart itself:

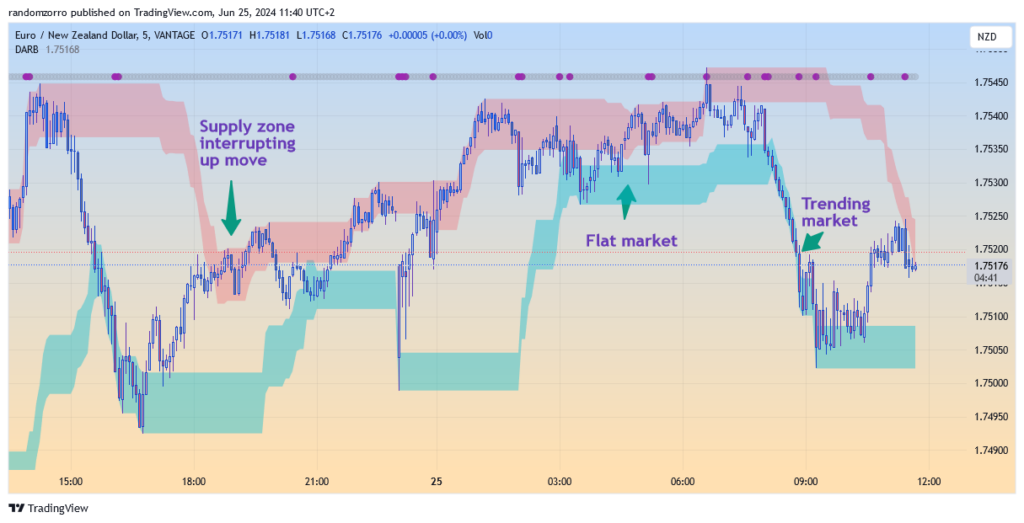
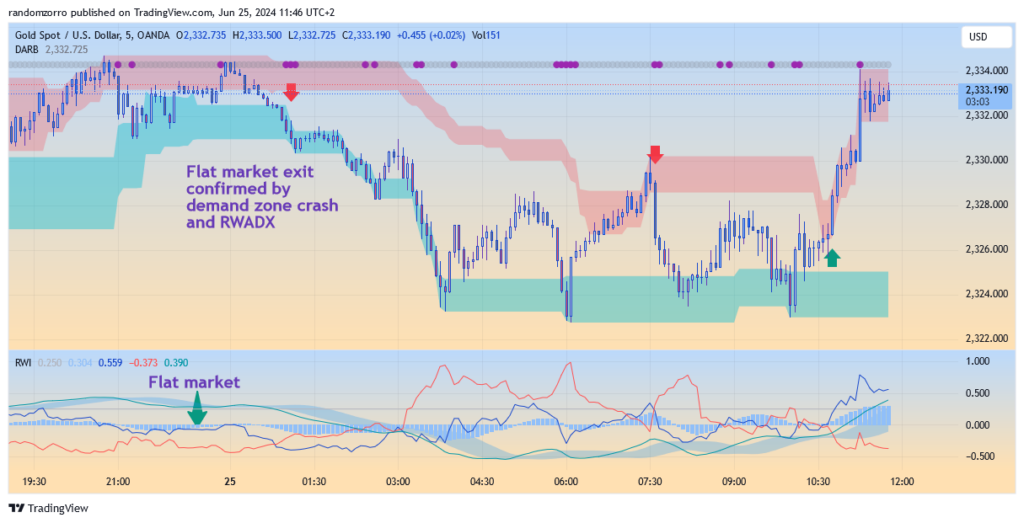
The supply zone is displayed in red colour, the demand in green colour. The outside is purely a Donchian channel and the width is a function of volatility. When prices take off from demand zone, they will go to demand zone. It may be also that demand zone comes to prices and stops the movement. A trend emerges if prices manage to go through the supply zone external band. Easy, isn’t it?
When supply and demand zone are close to each other, prices exit from one zone to fall immediately in the opposite zone, it kills the chance of getting a good trade. This is a flat erractic market.
Question: how do I get the buy signal? Come on! Just bring up the random walk index indicator! Crossings of RWI lines or crossing of RWADX with its signal line mark the spot!
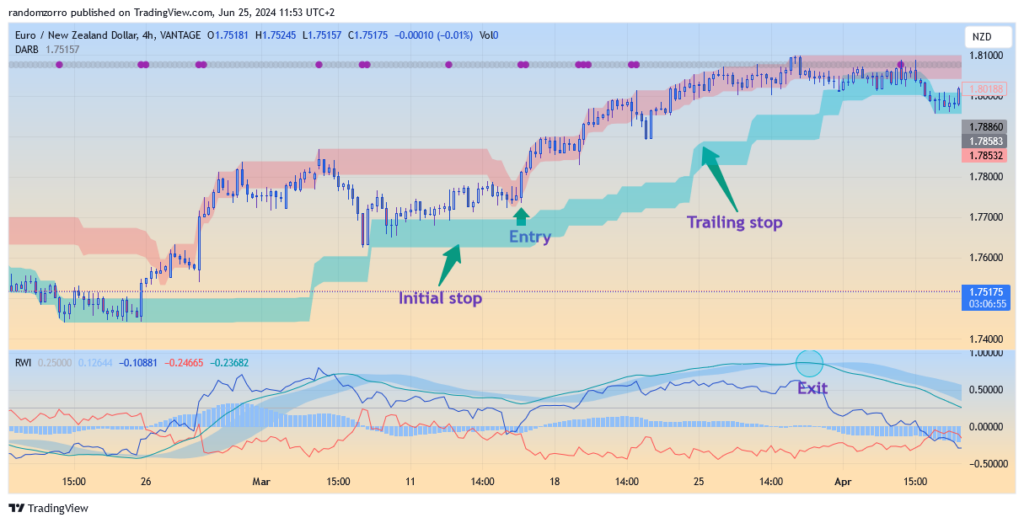
For a buy trade, your initial stop should be positioned slighly below the demand zone. Your first target price should be somewhere in the supply zone. If trend picks up, then a trailing stop just above the demand zone. Take partial profit along the path. Example of perfect trade:
That’s it! As a conclusion, random walk theory helps visualizing supply and demand zones, and therefore facilitates congestion zones indentification. We can trade between the bands or trade the trend when bulls or bears manage to go through. No other indicator is so flexible. Best indicator ever? Maybe 🙂
Until next time, trade safely.